La2 interlude where to download it. EE Guide - Elven Oracle - Elven Elder - Evas Saint
30.08.2017.
Hello everyone, today we will analyze such an interesting class on low-rate x1-10 servers like bish. This is a rather interesting profession and, in light of the triple classes of our game, it is even unique. I’ll say right away that the guide will be written under the conditions when a person will swing with his own hands.
So, let's begin. Bish is a support class focused on healing/removing debuffs/damaging raspberries for enemy supports/burning mana. Not a single serious batch is complete without a bish, and there will always be a condition that there are many benders and few bishes, that’s why they understand like hot cakes :) And like any magician, the bish is dependent on mana, that’s why I will be guided by when you have her-sha for filling, if not, then there won’t be much difference, we’re sitting on our butt and regenem after military exploits)
Since the features of the bish from mages consist only in leveling up, I will not dwell long on the choice of weapons and armor.
Weapon ---
20+ - any.
40+ -, other options are not considered at all, due to the fact that the bishu needs to raise the speed cast. (Imagine that you have little health, a bunch of hungry mobs are running after you, you ask the bisha to heal... and he, of course, I will save you, and starts a cast of 10 seconds :))
52+ - the same hamster, or . Due to the fact that we will be swinging by hand, it is preferable to roll, since there will be more damage to mobs, but if you are in a clan and are swinging with someone, then you can forget about choosing a weapon up to 62+
62+ here we have a choice to wander with a hamster or with (all on Akum) Sometimes on different servers I don’t know why, but a bish with a catfish grooms the same way as with an arch, sometimes not the same, so we test it and if there is no difference , then for pvp matches you already have weapons until the end of the game.
76+ - no options at all, really :) Same for Akum. We insert actives for the oli into the arch, and the arch looks more presentable :)
Armor ---
20+ any
40+, preferably with peppers but possible without them, it doesn’t make much difference
52+ is desirable due to the increase in mana, but if not, then we run around in pockets.
62+, since we will be swinging with our hands, we put on a dk set.
We are not changing 76+ due to the lack of speed cast grade sets in the game. BUT! We will still need it for Olya, so take it into account.
Kacha habitats.
Since ancient times, ancient hunters have noticed that if you want to catch such a rare bird on the farm as a bish, then you need to go to clearings full of undead) So we have reached the swing, and here everything is not very fun.
In fact, bish can only fight against mobs with the undead parameter. And we have only 1-2 clearings where only such mobs live for each lv interval. So be patient, due to the impossibility of changing the location of the swing, and go ahead into battle and sing :)
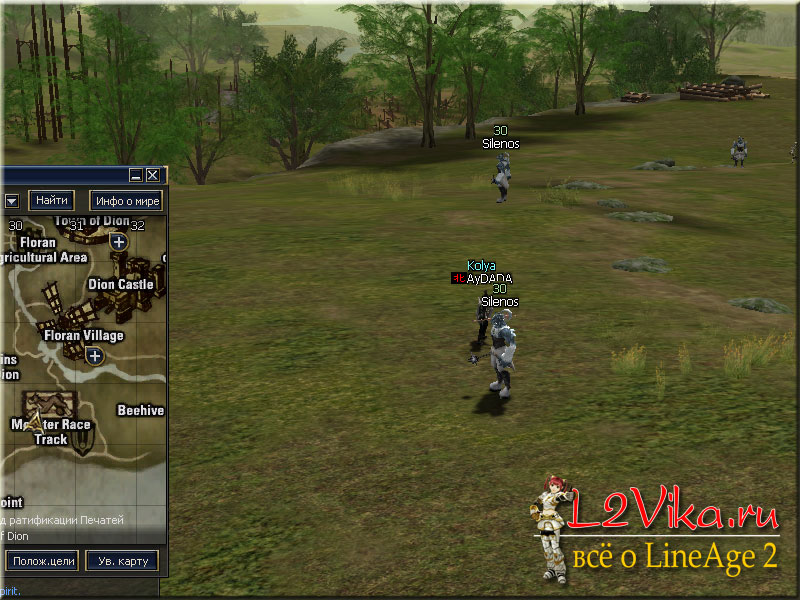
20+ we stomp into Gludio and from there to the ruins of agony, where the humans hit the knuckles for the first prof, mobs 20+ and farm them with a bang up to 25 lv.
25+ clearing on the hill with the undead near the hippodrome
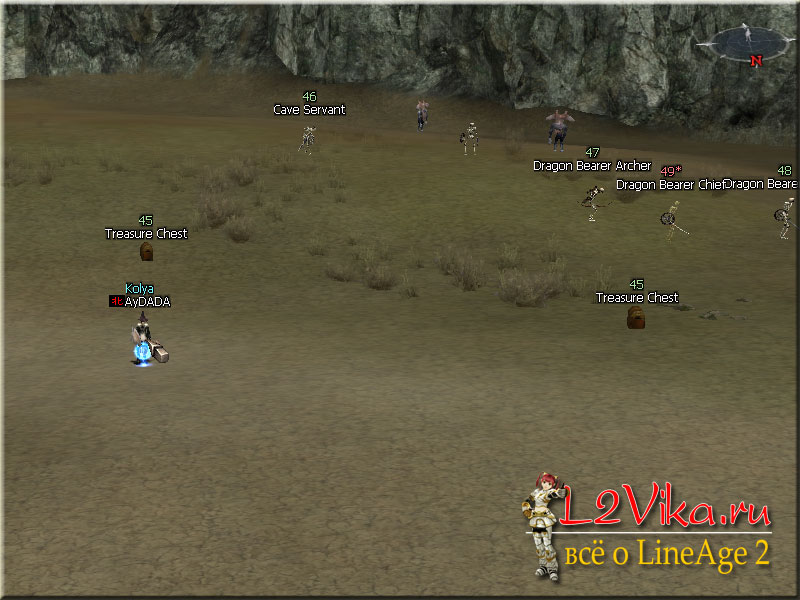
35+ dragon valley initial entry

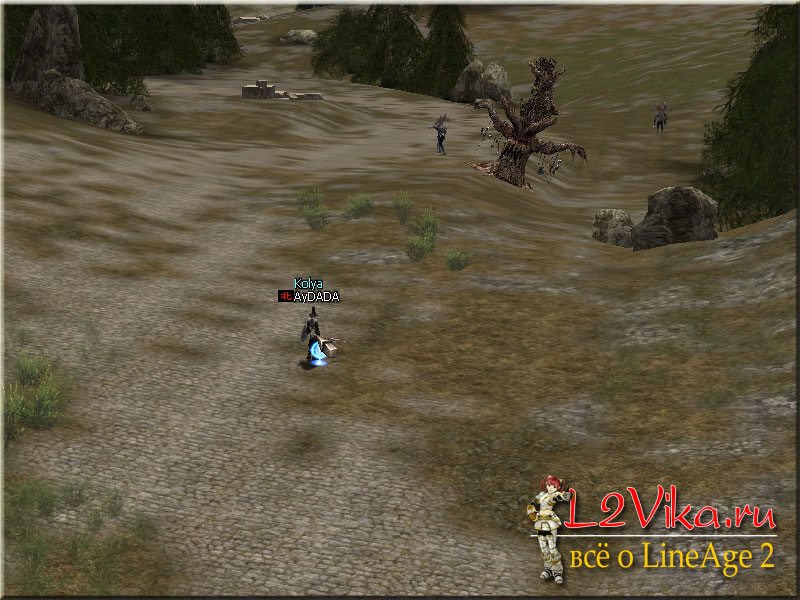
52+ ruined castle, from the TP point we run along the pictures and farm in that clearing or near it, there is almost never competition :)
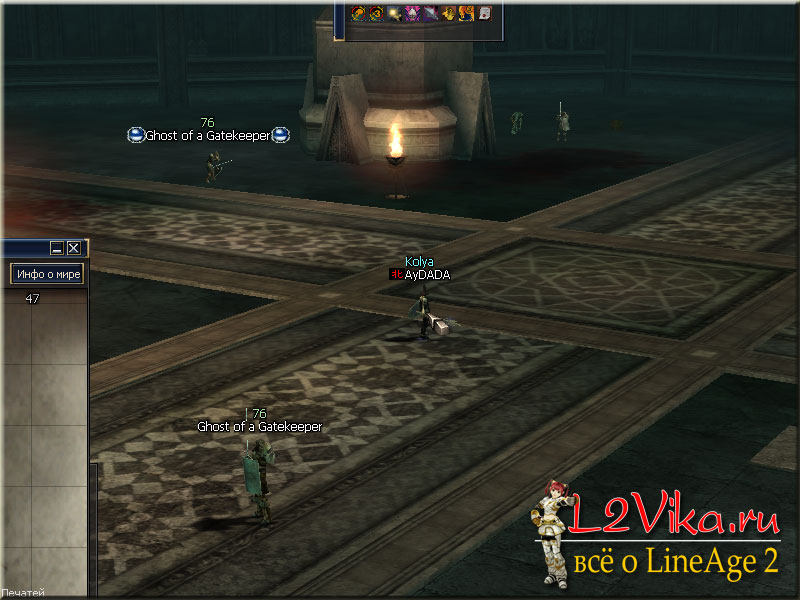
65+ is the first room in the tombs, where there is still an NPC at the entrance to Frintenze, keep in mind that at such a lvl the mobs will still be tough, so be patient and beat them :)
76-80+ pagan :)
PvP combat tactics.
I will always take the analysis of situations in the worst case scenario, when you have no epic/zero armor and your skills are not sharpened, because such moments force you to improvise and reveal your class to the maximum.
First sketch - 1. You are standing in a pack of archers at the bai crystal, a pack of archers is climbing up the ladder towards you. They try to target you, but you safely hide in the doorway to the bay and become inaccessible to them. From here we draw the first and very important conclusion: we can heal not by standing in an open field, but by using the folds of the terrain and being inaccessible to the enemy.
Second sketch - 2. You and your pack are standing in a room with an NPC on the way to Frintenza, 3 destras under limits are running towards you - one of which is hero.
Young bishies will immediately begin to heal their own and... as a result, everyone is more likely to fall, why? The room for the passage to the fritenza is very small, and there will not even be room for three destras to roam around there, so the time between the blow, the victim running away, the destra running up, and a new blow will be minimal, if not zero.
But you can turn the outcome of the batch in your favor in a simple way. When there are 4 steps left before you, you hang a target on yourself from around the corner, go out and give several battle heals to the sopatan. If your opponent is not an experienced warrior with 10+ years of experience in battles, then I guarantee you that he will aggro on you, and since you are targeted, you will give your party an extra few seconds to deal damage. Then, as soon as you realize that the destros have swallowed your bait, you switch, according to your visual assessment, to the most unprotected destra and begin to cast a dream.
I'll explain why. When the destroyer flies into the room, there is a high probability that your ally will simply “burst” - an effect in which the damage caused instantly turns from 100% HP to 0 and no healing will help here. And this way you will deprive the attacking forces of one of the destroyers, which will certainly weaken the damage dealt to your party. From here we draw the conclusion that sometimes it’s better not even to heal but to blind the enemy :)
P.s. There is a caveat to any rule, always think with your head when doing something. If your party contains only destroyers, then it would be more rational to heal them, since firstly they are unlikely to burst, and secondly they are melee.
Sketch three - 3. You stand and wait for the enemy, your pl said to stand and wait! but several of your, ahem, newcomers saw a harmless sheep in the distance and the scoundrels rushed towards it :) and now there were 9 of you, there became 6, these 6 understand that 3 rushed there, and after the three 4 more rushed, and now there are two of you left standing: ) stand when the whole party is already somewhere there and starting to mix)) From here we draw another important conclusion, when the whole party is somewhere there, the order to stand still sounds a little irrational :) or in other words, you should always have your own opinion and assessment situations on the battlefield, however, this does not mean that you should voice it :)
Sketch - 4. When there are two bish in a party, their responsibilities are divided into healing/burning MP/slip. The first heals - the second burns MP to enemies. The priority targets for burning mana are bish\ee\over\vk\daggermen and all melee classes that depend on mana. The priority targets of the slip are bish\ee\over. P.s. It is recommended to stick together with support, since everyone else often takes damage and immediately wakes up. I remember I had a batch where our party went up against the enemy party, I found myself within range of the enemy’s bish’s mana burn and lost 2500 mana in a few seconds, you don’t need to be a Vanga to predict that that batch was lost.
Skill point for everyday life and holidays.
Power.
- cost.
- cost.
- power.
- power. On strength because those 20 mana that you save will not extinguish the speed at which you will begin to lose your mana when using a skill :)
- power. The skill is purely for leveling.
- cost.
- cost.
- chance. There are no options, and the sooner you sharpen it to 10, the better for you.
Erase- cost. No options! Because they are not there))
- chance.
- power.
- power.
- cost. I'll explain why. This skill is no longer even for swinging or kneading, but for oli. We're sharpening it to the bone, because in the long run the damage per second is not so crazy and we can heal ourselves with it, and since the skill costs 90 mp -> sharpened at 10 - 70 mp+ with Arcane Wisdom turned on is no longer 70 but 31 mp, wonderful isn't it? ) With a major set dressed, we have almost endless healing))
- cost. We focus more on single healing/HP control.
That's all with the skill point and we move on to the topic of tattoos.
There are quite a lot of tattoo variations on the bisha, so here you should rely on your battle tactics and preferences, but I will highlight two tattoos that should ALWAYS be on the bisha!
This is +wit -men, +con -str.
1) more speed castes 2) more HP. Both increase our survivability. But choose the third tattoo yourself, you can put +1 vit to raise the speed cast even more, you can +con. I set +dex -str to increase running speed and not be a turtle :)
So we got a little bit to Olya. Remember one simple truth, the enemy doesn’t make mistakes, so focus on maximum concentration and go into battle!
Before oli, I mean that you already have a dk mag set +6, a majestic mag set +6, a talum mag set +0, a major set +0, a maximally sharpened arch with an active nuke lvl 10, a maximally sharpened bija or epic, then fights if desired. +6 and db+++.
Next, I will describe the standard situation against all classes, when we fly out to the Olympics, we should already be in a major set. On oli we immediately start buffing ourselves with mental fishing. Since we are in a major, we can buff ourselves with an avatar. And then the battle itself begins, we turn on the arcana to reduce MP and...
Bish vs Bish...
We are buffed, we are wearing a majestic set for MP regen. Next comes the following sequence of skills against the enemy with conditions. Mana Burn-slip-magical backfire-manaburn-and it went in a circle until the enemy had 0-3% MP left. Afterwards we begin to bludgeon him with nukes and drain him. Magical backfire with successful completion It’s better to try to shift every 20 seconds. In such a skirmish, the one with the most successful skills wins. Life hack. If you have little MP left and the enemy just half a second ago entered a slip, we press through meditation and regenerate MP :) usually bishy with magic nukes, so a mad crit does not threaten us. I don’t think it’s worth saying that when we apply the Magical Backfire debuff to ourselves, we must immediately remove it, because otherwise our mana will go to 0.
Bish vs Warlord...
We are buffed up, put on a dk mag set and begin to try to keep our distance. When the warlord approaches, we use a BB block and run away. The sequence of slip-man skills is burn-nuke. Give priority to nuke. If he doesn’t have any MP left, then we put on the Majestic and start kiting him. Beware of stun, aggro and HP recovery.
Bish vs Glad...
We are buffed up, put on a dk mag set and begin to try to keep our distance. When a strike approaches, we use the BB block and run back. Sequence of skills mana burn, nuke.
Glad is a very thick class, so you need to kill him as quickly as possible, because he is not dependent on MP (he can just kick him with Sonic, which costs a penny), and now we are nowhere without MP. Beware of triples and similar skills; if you let them close the distance, the battle may end in a couple of seconds.
Bish vs Paladin/Dark Avenger...
We are buffed up, put on a dk mag set and begin to try to keep our distance. When approaching the fire, we use the block of centuries. In general, I can say little about this type of fight, since I almost never opposed it. But as usual, we burn mana, nuke, and it is advisable to burn mana earlier. We are afraid of camps and arrest.
Bish vs th\pv\av...
We are buffed up, put on the dk mag set and begin to keep our distance. When TX approaches, we use the BB block and constantly burn mana. If this miracle used desh, then it is rational to throw it into sleep until it subsides. I also recommend quickly setting up a target for them in the macrome, otherwise we know them :) Otherwise, there is nothing complicated, we burn mana, throw nukes.
Bish vs hawk/cheese/gost...
We are buffed up, put on the dk mag set and begin to keep our distance. Nothing special at all, one of the easiest enemies. We burn mana and kill with a stick :)
Bish vs sorka\sx\ss...
We are buffed with resistance from fire/darkness, put on a talum mag set and begin to keep our distance. In the first seconds of the battle, a kencel flies at us, which we successfully try to knock down with sleep. After that, we burn the mana and roll until the magic backfire passes. Then we throw nukes at them and kill them, don’t forget about their natural regen, which can restore a little MP and give us an unpleasant surprise.
Bish vs Necromancer...
A very dangerous fight. We are buffed up, put on the dk mag set and wear it until the end of the battle. If the nekr is with a skeleton, then we stick the nekr together, kill the skeleton and start a carousel of burning mana and item debuffs, when 0% of mana remains, we hit with nukes. In principle, I went against a necra several dozen times, and I can say that usually by the end of his mana you have 1500-2000 left, which is enough :)
Bish vs. cat\horse\dark sumon...
I don’t know much about them, since in all my experience I haven’t had a single battle against them :) But in principle there shouldn’t be anything serious, we put on a dk mag set, burn out this miracle of mana, and kill. If the cat gets a response, then good, if not, then we try to beat the owner, who without mana will not be able to heal himself. The main thing is to keep the mana level low, otherwise he will heal himself and your damage will not be enough to effectively compete with the healer.
Bish vs pp\she...
This kind of fight makes it funny)) We put on a majestic magic set, drain all his MP, remove the BB, and kill the poor guy :) If he is a fan of heavy sets and bow fights, we run in the dk set, but it doesn’t make much of a difference.
Bish vs SVS\BD...
We put on a majestic magic set and try to keep our distance while burning mana. They will try to cut it down in any case to throw in the fat, and we throw them a block of BBs.
If this happened and they pinned fat on you, we immediately put on the dk mag set and start shooting, and since we have vv lv2 and bers, then we can compete with svs, and even more so with the bd. Further, if the fat didn’t get through to you and you burned out your MP and started hitting with nuke, this miracle can go to ud. It’s okay, we move three seconds away from him and go into a trance. Afterwards we finish it off calmly....
Bish vs her
The tactics are very similar against Bish. We put on a majestic and try to drain the enemy's mana faster than he can to us. The only difference is that she doesn't have a battle heal, but she has a......
We concentrate as much as possible, since to win we will be at a distance of a meter from the blow :) We are buffed, put on the dk mag set, and begin to heal the destra, so that this mischief does not turn on the limits, if we could not do this, then we remove it very, very carefully Vv to him, then we score with nukes. Perhaps successfully completing the BB block is a condition for victory in battle.
Bish vs Turant...
We are buffed up, running around in the recreation center mag set. Nasty fight... We drain all the mana of the tour with nukes, and very carefully make sure that he does not end up next to us, since he has strong, close-range attacks with a stun effect. And if the camp passes, then we’re screwed :)
Bish vs over/cook...
We run in a majestic set and keep our distance. The only terrible debuff for us is lard. We immediately take off everything else. When you put a watch on yourself, it is first removed and only then healed, and not vice versa, otherwise the healing rollback will be monstrous. We drain him of MP and constantly use medical backfire, throw nukes at him, provoking him to regenerate MP and burn his mana even more. Well, then, when he doesn’t have any MP left, we just kill him, he won’t be able to do anything to us.
The only difference with Vark is that he doesn’t have any scary debuffs for us, which makes him even easier to kill.
Bish vs Gnome...
- Elven Elder - support class, one of 4 classes that are indispensable in any party (EE, BP, BD, SvS). EE combines a healer, a buffer and a charger at the same time. The high casting speed allows you to treat a major with healing almost like Bishop Greater Battle with healing. EE has a set of unique buffs - clarity, decreased weight, resist shock, which no other class in the game has. Recharge, combined with clarity, high casting speed and high men, makes HER the best recharger. None of the other classes has such a wonderful thing as party recall - this is an instant blast to the city of the entire group. In addition to everything - beautiful skin light elves =) When playing as HER, you need to understand that this is not a DD, and to level up, as well as have an interesting time in the game, you need a good party const. The words about the uniqueness of EEshek were written before the Gracia Epilogue update. Now our skills are available to CE (4) and bishops (1), CE can apply for the position of a recharger and a second healer. Perhaps in PVE there will now be no difference between CE and EE, as well as between PP and warcraer. In pvp the difference is obvious - BoE and 20% speed castes.
I. Elven Elder from 1 to 85
- 1-19
- This gap has ceased to exist since Gracia 2, because... The first prof is taken very quickly through quests.
What useful skills do we get at these levels (I will describe the skills of the maximum level):
It is worth paying attention to SA Conversion (+60% mp, -40% hp) and Mana UP (+30% mp). An additional weapon with such a weapon can be useful in the exp, especially in locations with herbs, where the Superior Herb of Mana, which restores full mp, drops.
- Bijouterie: common top S.
- Tattoo: there are 2 options
- +4 con -5 str, +4 wit -4 men, +1 wit -1 men - maximum speed cast.
- +4 con -5 str, +4 wit -4 men, +4 dex -5 str - +5 running speed, compared to cast option 1, speed is lower by 5%, m def is higher by about 1%.
The choice of tattoo depends on the composition of the party and the style of play. Running speed is important in pvp and can be accelerated by talismans: yellow talisman - speed gives +3 speed (sold in the store), yellow talisman of speed gives +5 speed (can be obtained for epalettes in a castle/fort), yellow talisman of alacrity +3 speed (can be obtained for epalettes in the castle/fort). All three talismans can be worn at the same time (at 61+ with an A grade bracelet) and get +11 speed.
- Exp solo: 40-44 Hardin's Private Academy, Dragon Valley, The Forest of Mirrors(on ghosts), 44+ in inquisitor around Ivory Tower, Outlaw Forest.
- Skills:
- Skills:
Until now, all servers have not come to a conclusion which set is better - Dark Crystal or Majestic.
Here, too, there is no consensus on what is better - ma, dk or mf set. I think the ideal option is a +6 dk set.
Skill Transfer:
After receiving 3 professions, we are given the opportunity to learn one skill as a se or bishop. A skill can be canceled for 10kk and take another one. Skills can be sharpened. The choice depends on the composition of the party, pvp or pve orientation, and the olympiad. List of all skills:
- Purify is an indispensable skill in pvp for a party with two healers bp+ee.
- Greater Battle Heal - best option for the Open Olympics.
- Magical Backfire - for CB Olympics/party with three healers bp+ee+se/ee.
- Stigma of Shilien - in miles batches.
- Empower - this option is possible in magic parties, for exp duo with a magician or solo.
- Mass Resurrection - can be suitable for a party with three healers.
80+
The choice of set depends primarily on the server and the availability of epic bizhi; in essence, it is a choice between resistance to stun and paralysis. At the Olympics it is advisable to have 2 sets - Moirai and Vesper/Vorpal.
At this stage, there may be a lack of SP to learn skills. Therefore, it is better to skip learning some skills (for example Health, Skill Mastery) in order to learn the most necessary ones: PoW, Arcane Wisdom, Divine Lore, Mana Gain, Mass Recharge.
II. Skills Enchantment
The lvl of the skill increases from the skill sharpening lvl (learn lvl). This is important to know when sharpening debuffs (trance, block ww, wind shackle, erase) and recharge. To avoid a penalty for recharge, the difference between the lvl of the skill and the lvl of the character being filled should be no more than 5. Recharge +0 - lvl 74 skill. To fill a lvl 85 character without penalty, the recharge must be at least lvl 80, that is +13. It is also worth sharpening the main pvp buffs, because... The chance of its cancellation depends on the lvl of the buff.
- For skills 2 profs:
- +1 = lvl 76
- +4 = 77
- +7 = 78
- +10 = 79
- +13 = 80
- +16 = 81
- +19 = 82
- +22 = 83
- +25 = 84
- +28 = 85
- For skills 3 profs:
- +1 = 81
- +4 = 82
- +7 = 83
- +10 = 84
- +13 = 85
Skills that need to be sharpened (in my opinion, the most effective ways to sharpen skills are listed first):
- Recharge - cost
- Recharge - power
- Major Heal- power
- Major Heal- cost
- Clarity- power for magic skills (+6 must be sharpened, further according to the table)
- +0 - 10% clarity
- +6 - 11%
- +12 - 12%
- +18 - 13%
- +24 - 14%
- +30 - 15%
- Resist Shock- power
- Unholy Resistance- power, each sharpening level gives 4 dark resists.
- PoW- decrease penalty
- Mana Burn- cost
- Mana Burn- power
- Trance- time, each enchant level increases the duration of the debuff by 1 second.
- Trance- chance
- Wind Shackle- chance
- Wind Shackle- cost+time, each level of sharpening increases the duration of the debuff by 1 second.
- Erase- cost
- Block WW- chance
- Block WW- cost+time, each level of sharpening increases the duration of the debuff by 8 seconds.
- Divine Lore- power (+1 sharpening is required)
- +0 - 5% clarity
- +1 - 6%
- +8 - 7%
- +15 - 8%
- Arcane Wisdom- power
- +0 - 30% clarity
- +3 - 31%
- +6 - 32%
- +9 - 33%
- +12 - 34%
- +15 - 35%
- Wisdom- power, mental attack resistance, adds 2 for each enchant level.
- Robe Mastery- magic defense, each lvl of sharpening (except +6, +11, +16, +21, +26) gives 1% def.
- Fast Mana Recovery- power (+1 sharpening is required)
- Fast Spell Casting- power, each level of sharpening gives 0.1% speed casts.
- Anti Magic- powerHidden text
- """Turn Undead - attack, sharpen at +1 to swing solo in the rift/pagan. You can sharpen higher to increase the lvl of the skill to use it on mobs 80+ (Seed of Infinity, Hellbound).
III. Subclass Skills
When your subclass reaches lvl 65 and 70, as a main class you can learn general skills (Emergent Ability), which increase p def, m def, m atk, p atk. When the subclass reaches 75, you can learn similar general skills (Master Ability) or skills that depend on the subclass (Special Ability).
- Emergent Ability 65, 70 lvl:
- Magic Defense: 13-15 m def
- Physical Defense: 8-9 p def
- Master Ability 75 lvl:
- Great Magic Defense: 50 m def
- Great Physical Defense: 29-30 p def
What to choose, p def or m def, is up to you. Obviously, the increase in m def is greater. It is important to take one thing in order to overclock this parameter to the maximum. If you take all the skills in m defense from 3 subs, you will get an increase of 240 m def. If everything is in p def, then the bonus will be approximately 140 p def, which is also not small.
IV. Augmentation
- To main weapon:
- Any active nuke 10 lvl 110 power is required for the Olympics in S/S80/S84 weapons 150(300) of the corresponding attribute. To perform well in Olympics, it is advisable to have 2-3 weapons with different nukes.
- Passive Spell Clarity lvl 3 gives 20% clarity, a good augment for pve.
- In an additional weapon (it’s better to insert it in low c, augmentation will be much cheaper):
- Active Refresh (spell or general) reduces the cooldown of skills by 15%, hangs for 1 minute, cooldown 10 minutes.
- Active Magic Barier lvl 10 +77 m def regardless of the buff, hangs for 2 minutes, cooldown 5 minutes.
- Active Shield lvl 10 +71 p def regardless of the buff, hangs for 2 minutes, cooldown 5 minutes.
- Active Blessed Body lvl 10 +300 hp, hangs for 2 minutes, cooldown 5 minutes.
- Active Wild Magic lvl 10, hangs for 2 minutes, cooldown 5 minutes.
- Active Lesser Celestial Shield - invulnerability for 7 seconds, cooldown 30 minutes, disappears with any action. The peculiarity of this augment is that it does not replace other augment buffs, all others replace each other.
V. MP Regeneration & Clarity
- Overclocking mp regen:
- Majestic Robe Set +8%
- Sigil +17%
- AM SA MP Regeneration 3-4% (suitable only for pve)
- PoW +20%
- Magnus" Chant +4 MP per tick
- Song of Meditation +20%
- Embroider (crafter buff) +2 MP per tick
- Blessing of Seraphim +35%
- Fast Mana Recovery, focused on power
- Robe Mastery, focused on MP regen, +1 gives +4 MP per tick while sitting (suitable only for pve)
- Talismans: Yellow Talisman of MP Regeneration (sold in the store), Yellow ***Talisman of Mental Regeneration, Red Talisman of Mental Regeneration, Red ***Talisman of Meditation (similar to Invocation).
- Clan Clarity +3%
- Residence Clarity +0.47 MP regen (Aaru Fortress, Valley Fortress)
- Infinity Rod +0.51 MP regen, +30% MP
- Magic Rune Clip Belt MP Recovery top A-grade belt gives about +0.5 MP per tick
- Clarity acceleration:
- Arcane Wisdom 30% (+3 - 31%, +6 - 32% ...)
- Clarity 10% (+6 - 11%, +12 - 12% ...)
- Divine Lore 5% (+1 - 6%, +8 - 7% ...)
- PoW 5%
- Song of Meditation 10%
- Song of Renewal 5%
- Passive Spell Clarity lvl 3 20%
- Antharas Earring 5%
- Magician's Will 5%
- Enlightenment 90% for 20 seconds
- Talismans: Red Talisman of Minimum (~4%) and Maximum Clarity (100%)
- Holy Squad 5% clarity, 30% mp
- Masterwork SA Wisdom 5%
Clarity has no cap (limitation), you can overclock at least up to 100%. But the number of MP written on the skill is divided into 2 parts during casting. At the beginning of the cast, 1st part of the skill is spent, 20% of the cost. The remaining 80% is spent when the skill is cast. Clarity only affects the second part of the skill. For example, 90% of the clarities written on the Enlightenment skill will amount to 72% of the full cost of the skill.
VI. Pets
It's good for HER to have a bird Improved Baby Kookaburra(Baby Kookaburra), which fills mana and buffs em (convenient in archer/melee packs, where this buff is absent). The penalty for recharging is 15 lvls, and from the kookaburra you need to take the lvl at which the skill is given, i.e. 55, 60, 65 etc. The maximum difference in lvl is 24, if the difference is greater, then recharging will not work. At lvl 55, the kookaburra pours 120 MP, at 60 - 128, 65 - 138, 70 - 144, 75 - 149, 80 - 153. It starts pouring mana if your MP is less than 60% and you are in combat mode. The bird itself can also be filled and buffed with managain (similar to self-recharge). It is also convenient to load Spirit Ore for quality and GCP for PvP.
- Buffs:
- Level 55 - Empower 3 (2 Minutes), BtS 6 (20 Minutes)
- Level 60 - BtB 6 (20 Minutes), Shield 3 (2 Minutes)
- Level 65 - Concentration 6 (2 Minutes), Acumen 3 (2 Minutes)
VII. PvP Tactics
Before PvP, you need to check all the buffs of your party members and fill up everyone who needs it with MP. Main pvp buffs: Mental Shield (everyone), Resist Shock (everyone), Clarity (self, bp, bd, svsu, cooking, over, mages, daggers), Concentration (self, bishop and mages), Improved Shield Defense (all , who has a shield), Decrease Weight (to everyone who shouts “bag”), Wild Magic (to yourself, to Bishop and mages), Mana Gain (to everyone you are going to pour mana into, primarily to Bishop and Svsu). During PvP, you need to heal your party members, fill in mana in a timely manner, monitor the party’s buffs, to do this, play with an open buff bar (alt+f), if possible, rebuff after the cancellation, and first of all, kill the bishop. Don't forget to turn on Arcane Wisdom (the exception is short pvp and you are sure that you have enough mana until it ends).
If it is not mass pvp, and for example a gank, then EE is the first target for enemy damage dealers, so as not to make a PR. The tactics here are simple - live as long as possible. Celestial Shield, Turn to Stone and Enlightenment can help with this. You also need to use your position - any corner, stone, tree, pillar behind which you can hide from the focus.
In pvp against dagger packs on enemy damage dealers you need to use Mana Burn, Block WW and Wind Shakle. If one dagger takes you into focus, you should definitely turn to face him and mana/debuff him. If there are several daggers, all that remains is to kite, hoping for heal from the bishop and hate from the bd/svs.
In pvp against a magic pack, EE and BP are usually the last to be taken into focus because of their high def. In this case, the main thing is to treat your party members, if there are canning magicians against you - watch out for buffs and rebuff (so that everyone has Mental Shield, otherwise the bishop may be silenced, over debuffs), if possible, use Mana Burn and Block WW.
In pvp against archers, on the contrary, it is better to run up to the dd at point-blank range (of course, not at the very beginning of pvp to run forward and tank =)), throw Wind Shakle, Block WW on them, and manaber the healers. Before pvp, check that the shield is on, they will buff Resist Shock on everyone in the party.
Video games for class
© 2008-2019, Linedia - knowledge base and encyclopedia Lineage games 2 in Russian: quests and descriptions, walkthroughs and articles, things and monsters, classes and races, manuals and guides, skills and abilities.
Guide to EE (Elven Elder/Evas Saint)
Introduction.
Elven Elder (simply EE in the game) support – healer of the light elf race. It has the maximum speed of magic among similar classes, a set of enhancing effects, unfortunately suitable only for magicians, healing magic and wonderful pointy ears).
The task of this class in the game is to distribute buffs, fill MP, heal and resurrect characters, and even debuff enemies, sometimes all this will have to be done at the same time. Therefore, playing with these classes is much more difficult and more interesting than it might seem at first. In this guide on EE, I will describe all the points , related to character development from level 1 to maximum. I will describe all the equipment options so that you can choose one that suits your pocket, I will tell you about its actions in the conditions and many useful little things.
Leveling up and equipping your character:
I. Elven Elder from 1 to 85
- 1-19
- This gap has ceased to exist since Gracia 2, because... The first prof is taken very quickly through quests.
What useful skills do we get at these levels (I will describe the skills of the maximum level):
- 20-39
- 25
- 30
- 35
- 40-51**
It is worth paying attention to SA Conversion (+60% mp, -40% hp) and Mana UP (+30% mp). An additional one with such a weapon can be useful in the exp, especially in locations with herbs, where the restoring full MP of Superior Herb of Mana drops.
- : common top S.
- :
there are 2 options
- +4 con -5 str, +4 wit -4 men, +1 wit -1 men — maximum speed cast.
- +4 con -5 str, +4 wit -4 men, +4 dex -5 str — +5 running speed, compared to cast option 1, speed is lower by 5%, m def is higher by about 1%.
The choice depends on the composition of the party and the style of play. Running speed is important in pvp and can be accelerated by talismans: yellow talisman - speed gives +3 speed (sold in the store), yellow talisman of speed gives +5 speed (can be obtained for epalettes in a castle/fort), yellow talisman of alacrity +3 speed (can be obtained for epalettes in the castle/fort). All three talismans can be worn at the same time (at 61+ with an A grade bracelet) and get +11 speed.
- Exp solo: 40-44 Hardin's Private Academy, Dragon Valley, The Forest of Mirrors(on ghosts), 44+ in inquisitor around Ivory Tower, Outlaw Forest.
- Skills:
- Skills:
Until now, all servers have not come to a conclusion which set is better - Dark Crystal or Majestic.
Here, too, there is no consensus on what is better - ma, dk or mf set. I think the ideal option is a +6 dk set.
80+
The choice of set depends primarily on the server and the availability of bizhi; in essence, it is a choice between resistance to stun and paralysis. At the Olympics it is advisable to have 2 sets - Moirai and Vesper/Vorpal.
At this stage, there may be a lack of SP to learn skills. Therefore, it is better to skip learning some skills (for example Health, Skill Mastery) in order to learn the most necessary ones: PoW, Arcane Wisdom, Divine Lore, Mana Gain, Mass Recharge.
Skill Transfer:
After receiving 3 professions, we are given the opportunity to learn one skill as a se or bishop. A skill can be canceled for 10kk and take another one. Skills can be sharpened. The choice depends on the composition of the party, pvp or pve orientation, and the olympiad.
List of all skills
- Purify Lv3 (Cures Paralysis, neutralizes strong Poison and Bleeding.)
- Repose Lv13 (Reduces the level of aggression of undead.)
- Hold Undead Lv12 (Paralyzes undead for 30 sec.)
- Requiem Lv14 (For 2 minutes, neutralizes the aggression of the undead.)
- Empower Lv3 (M. Atk. +75%. Duration: 20 min.)
- Peace Lv15 (Makes the target more peaceful. The target's desire to attack is reduced.)
- Focus Lv3 (Crit. Atk. +30%. Duration: 20 min.)
- Resist Wind Lv3 (Defense against air attacks +20. Duration: 20 min.)
- Greater Battle Heal Lv33 (Instantly restores HP. Power 858.)
- Guidance Lv3 (For 20 minutes, increases Accuracy by 4.)
- Death Whisper Lv3 (For 20 minutes, increases critical strike power by 35%.)
- Mass Resurrection Lv6 (Resurrect a dead clan member. Always returns 55% experience.)
- Restore Life Lv4 (Restores 30% HP.)
- Vampiric Rage Lv4 (For 20 minutes, with a certain chance, returns 9% of HP from damage dealt to the enemy. Does not apply to damage from skills and ranged weapons.)
- Benediction Lv1 (Restores HP of all party members. Can only be used if your character's MP is below 25%. Cooldown 900 sec.)
- Prayer Lv3 (Increases the HP recovery efficiency of all party members by 12%. Duration: 20 min.)
- Body of Avatar Lv6 (Restores 35% HP of party members and increases Max HP by 35%. Duration: 20 min.)
- Resist Holy Lv3 (Increases resistance to holy attacks by 30. Duration: 20 min.)
- Magical Backfire Lv10 (Increases your enemy's MP consumption by 200%. Duration: 1 min.)
- Mana Storm Lv5 (Burns MP of all nearby enemies. Power 81.)
- Major Group Heal Lv5 (Instantly restores HP of party members. Consumes 4 units of Spirit Ore. Power 1170. Reading 7s, Cooldown 3s.)
- Celestial Shield Lv1 (The skill concentrates divine power on the target to make it invincible for 10 sec. Cooldown 600s.)
- Blessed Blood Lv7 (Puts a blood blessing on a party member. Gives a chance to restore HP when the character is attacked. Duration: 15 sec.)
- Stigma of Shillen Lv4 (Weaken defense against melee weapons by 40. Duration: 30 sec. Cast 1.5s, Cooldown 3s.)
- Purify is an indispensable skill in pvp for a party with two healers bp+ee.
- Greater Battle Heal is the best option for the Open Olympics.
- Magical Backfire - for CB Olympics/party with three healers bp+ee+se/ee.
- Stigma of Shilien - in melee batches.
- Empower - this option is possible in magic parties, for a duo exp with a magician or solo.
- Mass Resurrection - can be suitable for a party with three healers.
II. Skills Enchantment
The lvl of the skill increases from the skill sharpening lvl (learn lvl). This is important to know when sharpening debuffs (trance, block ww, wind shackle, erase) and recharge. To avoid a penalty for recharge, the difference between the lvl of the skill and the lvl of the character being filled should be no more than 5. Recharge +0 - lvl 74 skill. To fill a lvl 85 character without penalty, the recharge must be at least lvl 80, that is +13. It is also worth sharpening the main pvp buffs, because... The chance of its cancellation depends on the lvl of the buff.
For skills 2 profs:
+1 = lvl 76
+4 = 77
+7 = 78
+10 = 79
+13 = 80
+16 = 81
+19 = 82
+22 = 83
+25 = 84
+28 = 85
For skills 3 profs:
+1 = 81
+4 = 82
+7 = 83
+10 = 84
+13 = 85
Skills that need to be sharpened(the most effective sharpening methods, in my opinion, are listed first):
1)Recharge- cost
0 - mp 137
+1 — 133
+2 — 131
+3 — 128
+4 — 126
+5 — 125
+6 — 122
+7 — 120
+8 — 117
+9 — 115
+10 — 112
+11 — 111
+12 — 108
+13 — 106
+14 — 103
+15 — 101
+16 — 98
+17 — 97
+18 — 95
+19 — 92
+20 — 90
+21 — 87
+22 — 86
+23 — 83
+24 — 81
+25 — 78
+26 — 76
+27 — 73
+28 — 72
+29 — 70
+30 — 67
Recharge— power
0 - power 136
+1 — 137
+2 — 137
+3 — 138
+4 — 139
+5 — 139
+6 — 140
+7 — 141
+8 — 141
+9 — 142
+10 — 143
+11 — 143
+12 — 144
+13 — 145
+14 — 146
+15 — 146
+16 — 147
+17 — 148
+18 — 148
+19 — 149
+20 — 150
+21 — 150
+22 — 151
+23 — 152
+24 — 152
+25 — 153
+26 — 154
+27 — 154
+28 — 155
+29 — 156
+30 — 156
2) Major Heal— power
0 - power 946
+1 — 958
+2 — 972
+3 — 985
+4 — 999
+5 — 1012
+6 — 1026
+7 — 1039
+8 — 1053
+9 — 1067
+10 — 1080
+11 — 1094
+12 — 1107
+13 — 1121
+14 — 1134
+15 — 1148
+16 — 1162
+17 — 1175
+18 — 1189
+19 — 1202
+20 — 1216
+21 — 1229
+22 — 1243
+23 — 1257
+24 — 1270
+25 — 1284
+26 — 1297
+27 — 1311
+28 — 1324
+29 — 1338
+30 — 1352
Major Heal- cost
0 - mp 80
+1 — 77
+2 — 76
+3 — 75
+4 — 73
+5 — 72
+6 — 71
+7 — 70
+8 — 68
+9 — 67
+10 — 66
+11 — 65
+12 — 63
+13 — 62
+14 — 61
+15 — 60
+16 — 57
+17 — 56
+18 — 55
+19 — 53
+20 — 52
+21 — 51
+22 — 50
+23 — 48
+24 — 47
+25 — 46
+26 — 45
+27 — 43
+28 — 42
+29 — 41
+30 — 40
3) Vitalize- cost
0 - 144 mp
+1 — 141
+2 — 138
+3 — 136
+4 — 133
+5 — 131
+6 — 128
+7 — 126
+8 — 123
+9 — 121
+10 — 118
+11 — 116
+12 — 113
+13 — 111
+14 — 108
+15 — 106
+16 — 103
+17 — 102
+18 — 100
+19 — 97
+20 — 95
+21 — 92
+22 — 90
+23 — 87
+24 — 85
+25 — 82
+26 — 80
+27 — 77
+28 — 75
+29 — 72
+30 — 70
4) Clarity— power for magic skills (+6 must be sharpened)
0 – 10% clarity
+6 — 11%
+12 — 12%
+18 — 13%
+24 — 14%
+30 — 15%
5) Resist Shock— power
0 - increases stun resistance by 40%
+1 — 40%
+2 — 41%
+3 — 42%
+4 — 42%
+5 — 43%
+6 — 44%
+7 — 44%
+8 — 45%
+9 — 46%
+10 — 46%
+11 — 47%
+12 — 48%
+13 — 48%
+14 — 49%
+15 — 50%
+16 — 50%
+17 — 51%
+18 — 52%
+19 — 52%
+20 — 53%
+21 — 54%
+22 — 54%
+23 — 55%
+24 — 56%
+25 — 56%
+26 — 57%
+27 — 58%
+28 — 58%
+29 — 59%
+30 — 60%
6) Unholy Resistance— power, each sharpening level gives 4 dark resists.
7) PoW- decrease penalty
0 - reduces movement speed by 20%
+1 — 17%
+2 — 15%
+3 — 13%
+4 — 11%
+5 — 10%
+6 — 9%
+7 — 8%
+8 — 7%
+9 — 6%
+10 — 5%
+11 — 4%
+12 — 3%
+13 — 2%
+14 — 1%
+15 — 0%
8)
Mana Burn- cost
0 - mp 103
+1 — 100
+2 — 97
+3 — 96
+4 — 95
+5 — 92
+6 — 91
+7 — 90
+8 — 87
+9 — 86
+10 — 85
+11 — 82
+12 — 81
+13 — 78
+14 — 77
+15 — 76
+16 — 73
+17 — 72
+18 — 71
+19 — 68
+20 — 67
+21 — 66
+22 — 63
+23 — 62
+24 — 60
+25 — 58
+26 — 57
+27 — 55
+28 — 53
+29 — 52
+30 — 50
Mana Burn— power
0 - power 162
+1 — 162
+2 — 163
+3 — 164
+4 — 164
+5 — 165
+6 — 166
+7 — 166
+8 — 167
+9 — 168
+10 — 168
+11 — 169
+12 — 170
+13 — 170
+14 — 171
+15 — 172
+16 — 172
+17 — 173
+18 — 174
+19 — 174
+20 — 175
+21 — 176
+22 — 176
+23 — 177
+24 — 178
+25 — 178
+26 — 179
+27 — 180
+28 — 180
+29 — 181
+30 — 182
9)
Trance— time, each enchant level increases the duration of the debuff by 1 second.
Trance- chance
10)
Wind Shackle— cost+time, each level of enchant increases the duration of the debuff by 1 second.
Wind Shackle- chance
11) Erase- cost
12) Block WW- chance
Block WW— cost+time, each level of enchant increases the duration of the debuff by 8 seconds.
13) Divine Lore
0 – 5% clarity
+1 — 6%
+8 — 7%
+15 — 8%
14) Arcane Wisdom— power
0 – 30% clarity
+3 — 31%
+6 — 32%
+9 — 33%
+12 — 34%
+15 — 35%
15) Wisdom— power, mental attack resistance, adds 2 for each enchant level.
16) Robe Mastery— magic defense, each enchant level (except +6, +11, +16, +21, +26) adds 1% def.
17) Fast Mana Recovery— power (+1 sharpening is required)
0 — MP regen increased by 3.4
+1 — MP regen increased by 4
+2 - MP regen increased by 4.1
+3 — MP regen increased by 4.2
+4 - MP regen increased by 4.2
+5 — MP regen increased by 4.3
+6 — MP regen increased by 4.4
+7 — MP regen increased by 4.4
+8 — MP regen increased by 4.5
+9 — MP regen increased by 4.6
+10 — MP regen increased by 4.6
+11 — MP regen increased by 4.7
+12 — MP regen increased by 4.8
+13 — MP regen increased by 4.8
+14 — MP regen increased by 4.9
+15 — MP regen increased by 5
+16 — MP regen increased by 5
+17 — MP regen increased by 5.1
+18 — MP regen increased by 5.2
+19 — MP regen increased by 5.2
+20 — MP regen increased by 5.3
+21 — MP regen increased by 5.4
+22 — MP regen increased by 5.4
+23 — MP regen increased by 5.5
+24 — MP regen increased by 5.6
+25 — MP regen increased by 5.6
+26 — MP regen increased by 5.7
+27 — MP regen increased by 5.8
+28 — MP regen increased by 5.8
+29 — MP regen increased by 5.9
+30 - MP regen increased by 6
18) Fast Spell Casting— power, each lvl of sharpening gives 0.1% speed castes.
19) Anti Magic— power
0 - m def increased by 108
+1 — 113
+2 — 114
+3 — 115
+4 — 115
+5 — 116
+6 — 117
+7 — 117
+8 — 118
+9 — 119
+10 — 119
+11 — 120
+12 — 121
+13 — 121
+14 — 122
+15 — 123
+16 — 123
+17 — 124
+18 — 125
+19 — 125
+20 — 126
+21 — 127
+22 — 127
+23 — 128
+24 — 129
+25 — 129
+26 — 130
+27 — 131
+28 — 131
+29 — 132
+30 — 133
20) Turn Undead— attack, sharpen to +1 to swing solo in a rift/pagan. You can sharpen higher to increase the level of the skill in order to use it on mobs 80+ (Seed of Infinity, Hellbound).

III. Subclass Skills
When your subclass reaches lvl 65 and 70, as a main class you can learn general skills (Emergent Ability), which increase p def, m def, m atk, p atk. When the subclass reaches 75, you can learn similar general skills (Master Ability) or skills that depend on the subclass (Special Ability). Once the subclass reaches level 80, the transformation divine becomes available.
Emergent Ability 65, 70 lvl:
- Magic Defense: 13-15 m def.
Physical Defense: 8-9 p def.
Master Ability 75 lvl:
- Great Magic Defense: 50 m def.
Great Physical Defense: 29-30 p def.
Special Ability 75 lvl, interesting skills for us are:
Counter Defense: when receiving damage, chance of increasing p def/m def by 24% for 15 seconds ( Knight- tk/pal/da).
Counter Barrier: when receiving damage, chance to gain invulnerability for 5 seconds ( Enchanter- wark/pp/svs).
Divine Transformations 80 lvl:
Transform Divine Healer (Healer- Bishop), the following skills are available in transformation:
Divine Healer Major Heal- analogue of major heal, power 946.
Divine Healer Battle Heal- analogue of GBH, power 826.
Divine Healer Resurrection— 90% res like Bishop.
Divine Healer Clans— klinz (very relevant in this update).
Divine Healer Group Heal- analogue of Greater Group Heal, power 400.
Sacrifice Healer— restores HP and MP to all party members, including yourself. Available only when MP is less than 10%. After use, a 5-minute debuff is applied (does not impact), preventing HP from rising above 10%.
Transformation rollback 4 hours.
IV. Augmentation
To main weapon:
1) Any active nuke 10 lvl 110 power required for the Olympics in S/S80/S84 weapons 150(300) of the corresponding attribute. To perform well in Olympics, it is advisable to have 2-3 weapons with different nukes.
2) Passive Spell Clarity lvl 3 gives 20% clarity, a good augment for pve.
Into additional weapons(it’s better to insert into low c, augmentation will be much cheaper):
1) Active Refresh(spell or general) reduces skill cooldown by 15%, duration 1 minute, cooldown 10 minutes.
2) Active Magic Barier lvl 10+77 m def regardless of the buff, duration 2 minutes, cooldown 5 minutes.
3) Active Shield lvl 10+71 p def regardless of the buff, duration 2 minutes, cooldown 5 minutes.
4) Active Blessed Body lvl 10+300 hp, duration 2 minutes, cooldown 5 minutes.
5) Active Wild Magic lvl 10, duration 2 minutes, cooldown 5 minutes.
6) Active Lesser Celestial Shield- invulnerability for 7 seconds, cooldown 30 minutes, disappears with any action. The peculiarity of this augment is that it does not replace other augment buffs, all others replace each other.

V. MP Regeneration & Clarity
Overclocking mp regen:
1) Vesper Robe Set +5.57%, Vorpal/Elegia Robe Set+5%, Majestic Robe Set +8%
2) Sigil +17%
3) Necklace of Freya +0.23, Blessed Necklace of Freya +0.46
4) AM SA MP Regeneration 3-4% (suitable only for pve)
5) PoW +20%, Magnus' Chant+4 MP per tick
6) Song of Meditation+20%
7) Embroider(crafters buff) +2 MP per tick
8) Blessing of Seraphim +35%
9) Fast Mana Recovery, sharpened for power
10) Robe Mastery, sharpened for MP regen, +1 gives +4 MP per tick while sitting (suitable only for pve)
11) Talismans: Yellow Talisman of MP Regeneration (sold in the store), Yellow Talisman of Mental Regeneration, Red Talisman of Mental Regeneration, Red Talisman of Meditation (similar to Invocation).
12) Clan Clarity +3%
13) Residence Clarity+0.47 MP regen (Aaru Fortress, Valley Fortress)
14) Infinity Rod+0.51 to MP regen, +30% MP
15) Magic Clip Belt MP Recovery
low A - 0.14 (0.3 sitting)
mid A - 0.35 (0.75 sitting)
high A - 0.49 (1.05 sitting)
top A - 0.7 (1.5 sitting)
low S — 0.3 (0.6 sitting)
mid S - 0.75 (1.5 sitting)
high S - 1.05 (2.1 sitting)
top S – 1.5 (3 sitting)
Clarity acceleration:
1) Arcane Wisdom 30% (+15 — 35%)
2) Clarity 10% (+30 — 15%)
3) Divine Lore 5% (+15 — 8%)
4) PoW 5%
5) Song of Meditation 10%
6) Song of Renewal 5%
7) Passive Spell Clarity lvl 3 20%
8) Antharas Earring 5%
9)
Magician's Will 5%
10) Enlightenment 90% for 20 seconds
11) Talismans: Red Talisman of Minimum (4%) and Maximum Clarity (100%)
12) Holy Squad 5% clarity, 30% mp
13) Masterwork SA Wisdom 5%
14) Vesper Noble/Elegia Set 3%
Clarity has no cap (limitation), you can overclock at least up to 100%. But the number of MP written on the skill is divided into 2 parts during casting. At the beginning of the cast, 1st part of the skill is spent, 20% of the cost. The remaining 80% is spent when the skill is cast. Clarity only affects the second part of the skill. For example, 90% of the clarities written on the Enlightenment skill will amount to 72% of the full cost of the skill.

VI. Boss/OlympiadJewelry, TW, PvP & Masterwork Items
Boss Jewelry
Ring of Queen Ant
(M. Def. 48) MP +21, increase resistance to poison by 30%, increase poison attack chance by 30%, increase accuracy, increase critical damage, increase resistance to hold by 20%, and increase hold attack chance by 20%.
Mystic classes usually prefer to wear a c80/84 ring instead of this epic, because... its only benefit is 20% resistance to hold attacks (root, arrest, etc.). In fact, a bd, svs or tank with +30 arrest, 2 rings and tv bij can do a lot of harm in pvp, so in the absence of a baium, an ant queen will not be superfluous. It can also be useful for leveling up a sub at the Olympics against tanks, although at Olympics it is better to use the Olympiad Warrior’s Ring for this purpose.
Ring of Baium(M. Def. 48) MP +21, increase resistance to poison by 40%, increase poison attack chance by 40%, increase accuracy, increase critical damage, increase resistance to hold by 30%, increase hold attack chance by 30%, increase Atk. Spd. and Casting Spd.
Gives 4% cast speed and resistance to root. In daily pvp it’s not critical, at the olympics you can’t do without it.
Earring of Zaken(M. Def. 71) MP +31, increase resistance to bleed by 30%, increase bleed attack chance by 30%, vampiric rage,increase healing effects,increase resistance to stun/abnormal mental state attack by 20%, and increase stun/abnormal mental state attack chance by 20%.
Usually, in terms of price, this is one of the most affordable epics, and in terms of value, it is one of the most important, because... mental and stun resistances play a very important role in pvp.
Blessed Earring of Zaken(S84 - M. Def. 94) MP +37, 30% increase in Bleed Resistance, 30% increase in Bleed Attack Rate, 15% increase in Heal amount, Vampiric Rage effect, 30% increase in Stun/Mental Attack Resistance, 30% increase in Stun/Mental Attack Rate, and 15 Dark resistance.
A new version of Zaken with resists like Antaras, practically unavailable to anyone yet.
Earring of Antharas(M. Def. 94) MP +37, increase resist bleed by 50%, increase bleed attack chance by 40%, increase healing effects, vampiric rage, 30% increase in stun/abnormal mental state resistance, increase stun/abnormal mental state attack chance by 30%, decrease MP consumption, and increase resistance to earth attacks.
The most valuable not only for EE, but for any class in the game in general.
Necklace ofFrintezza(M. Def. 95) MP +42, increase resistance to sleep/paralysis/stun by 15%, increase sleep/paralysis/stun attack chance by 15%, increase resistance to poison/bleed by 25%, increase poison/bleed attack chance by 25%, decrease in skill re-use delay, increases Damage Shield effect, and increase resistance to Dark attacks.
Good resists and skill rollback (5%). But Frintezza, as well as Freya and Valakas, have one drawback - the reflex effect. In pvp with tech under the mirage, the cast will be disrupted and the target will be reset when it hits with a simple attack. In such cases, it must be removed or replaced with a simple necklace.
Necklace ofFreya(M. Def. 125) water resistance +10, bleed resistance +20%, paralysis/shock/sleep resistance +15%, magic skill reuse delay -5%, reflect 4% short-range attack damage, max MP +50, MP Regeneration +0.23, mental attack resistance +10%.
An alternative to Frintezza, it gives more damage and resistance to mental attacks.
BlessedNecklace ofFreya(M. Def. 132) water resistance +15, bleed resistance +25%, paralysis/shock/sleep resistance +20%, magic skill reuse delay -5%, reflect 4% short-range attack damage, max MP +50, MP Regeneration +0.46, mental attack resistance +10%, caster heal capacity +15.6, Men +2, Con +1, Str -1, magic MP consumption -5%.
Epic with the highest mdef and wonderful resists, but practically inaccessible to anyone.
Necklace of Valakas(M. Def. 125) MP +50, HP +445, increase resistance to sleep by 40%, increase sleep attack chance by 40%, decrease in skill re-use delay, increase in P. Atk. and M. Atk., Wild Magic effect, Damage Shield effect and increase in resistance to Fire attacks.
M attack, m crit, skill rollback 10% - everything for mana burn, as well as a HP bonus and + 40% to passing trance,
Beleth's Ring(M. Def. 48) MP +38, HP +105, increase M.Def. by 12%, increase resistance to abnormal mental state by 10, increase abnormal mental state attack chance by 10, increase MP recovery rate by 0.23, and increase resistance to Dark attacks by 30.
Still no one can farm.
Olympiad Jewelry
For Olympiad Tokens and Grand Olympiad Manager you can buy an A-grade shadow bijou, which is given for 60 days and is a stripped-down version of the epic biju.
Olympiad Warrior's Ring(22k Olympiad Tokens, M Def: 42) MP +21, increase accuracy and critical damage, 30% hold resistance increase, 30% hold attack rate increase(analogous to ant queen, resists to root like baium).
Olympiad Warrior's Earring(33k Olympiad Tokens, M Def: 63) MP +31, 20% increase to shock/mental resistance, 20% increase to shock/mental attack rate and Vampiric Rage(analogous to zaken).
Olympiad Warrior's Necklace(44k Olympiad Tokens, M Def: 85) MP +42, 15% increase to Sleep/Paralysis/Shock resistance, 15% increase to Sleep/Paralysis/Shock attack rate, decreases skill reuse delay and reflects damage(similar to frintezza).
TW Items
In the epilogue, new jewelry was introduced, which is given as a reward for the Territory Badge. It has a m def like the dynasty bizhi and is a good alternative or addition to the epic bizhi. Rings give +15 resist to various elements, necklaces +30 resist, earrings give several different bonuses. The Innadril earring is most suitable for HER:
Innadril Guard Earring— sleep attack +15%, stun protection +15%, water protection +10, CP +5%.
You can also do Belt() for the Territory Badge. slightly increases p def and with the help additional options can increase the number of inventory cells, maximum carry weight, defense or damage in pvp, HP or MP regen.
Magic Ornament Mithril Belt PvP Defense— increases protection in pvp from physical attacks and skills:
Top-grade by 6%
High-grade by 4.2%
Regular by 3%
Low-grade by 1.2%
PvP Items
Starting from top A grade, you can add additional pvp bonuses to weapons and armor from the Reputation Manager for fame. You cannot insert/remove an attribute, augment, essence (in dynasty), or noble stones (in Vesper) into a pvp item. Can only be sharpened, so make sure you get everything you need in first.
PvP weapons: increases damage in pvp, chance when receiving damage to increase casting speed by 15% for 10 seconds.
PvP armor: reduces damage dealt in pvp by 5% and gives a chance to reduce the frequency and strength of critical hits.
Masterwork Items
Rare weapon
Of all the possible rare ones, the ones that are most interesting to us are: Wisdom(5% clarity), Nature(max MP +289), Earth(increases max HP) and Holy Spirit(increases healing power):
Flaming Dragon Skull - Wisdom
Sword of Miracles - Holy Spirit
Arcana Mace - Nature
Dynasty Mace - Earth
Dynasty Phantom - Nature
Rare armor
To get the maximum bonus from the set and foundation items, it is necessary that the robe/tunic be normal, and the helmet/peppers/bots/bottoms be foundation. Usually, rare parts of a set give the same bonuses as the set itself in % terms (except for the int, wit, men stats and speed casts) and in total they will give a bonus almost equal to that of the set. For example, the tallum set gives 8% def. A set with foundation parts will give ~7% more def. This % is distributed between the parts, the bottom usually gives the largest part, and the peppers and bots the smallest.
PvP and mass PvP
I will continue my guide to EE with a description of actions during mass batches. This implies that you have a group to follow. If there is a bish in the group, you need to monitor him first, fill him with MP, heal him, resurrect him. Remove the target from him only if absolutely necessary. If there is no bish and you are the only healer in the group, it will be much more difficult. You will have to work for two, the actions are the same, we heal, monitor MP, and resurrect. It is most convenient to do this in the group window, so as not to look for the desired character among others in the center of the batch.
PvP (I’ll also include actions in the Olympus arena here) - in order to be able to deal damage in comfortable conditions (without using the transformation into an inquisitor, thereby losing the opportunity to be treated_), we take 2-3 magic fluff, a bunch of life stones and catch active ones nukes. I have already discussed this issue in more detail above.
In Olympus conditions, everything is simple. We throw a full buff on ourselves - this is our main advantage; not many classes can boast of this. We attack with nukes from LS, changing weapons so as not to wait for a rollback, heal, put us to sleep in a trance, burn out the enemy's PM, run from him, and if necessary, throw an explosive block. If you and your opponent have no fundamental difference in equipment, then your chances of winning are great. If you have not prepared your character for Olympus farming, it will be difficult. Especially problems can arise with classes such as tanks, overkill, healers, and magicians with crazy magic-crit.
In PvP conditions, the situation changes a little because the enemy may also be under a full buff and the attack will no longer be so effective. At first it will be difficult. But after gaining some experience, you will understand that PvP in the field is not much more difficult than PvP on Olympus.
Conclusion
This is where I’ll end my guide to EE (Elven Elder/Evas Saint), since I’ve already stretched it out enough. But I hope you have found the answers to all your questions in full and found my guide to EE interesting and useful for you.
Useful tips for the game.
If you are tired of Olympus farming, PvP, quality and want to relax a little by playing another online game for me I liked it transformers game,I recommend.
Lyrics
No race has such internal energy as this one. What is closer to you? Perhaps the unsurpassed grace of seduction: the languid curves of the figure, a huge bust, a narrow waist and the eyes of a fatal beauty, or the well-tailored silhouette of a fighter, whose body consists of a plexus of muscles and cold fearlessness? In any case, dark skin color, night and the magic of the goddess Shilen will be your companions until the end of time in this world. You have to love this race with all your being: you just have to admire your sexy chosen one or be completely proud of your arrogant dark knight and never, never doubt your choice. Dark elves are a game style, image and charisma.
Basic characteristics
- INT- 44, the highest, which sets us apart from everyone, is responsible for the strength of the Magic attack and the imposition of debuffs
- WIT- 19, the lowest, is responsible for the speed of casting spells and the probability of a Critical hit. We were unlucky here and without additional buffs, equipment and tattoos, we shouldn’t go on the warpath.
- MEN- 37, is responsible for the amount of mana and its recovery, also affects Mage Defense and resistance to Mental attacks. Here we are also in last place, but this does not affect us much. because This is the first Characteristic that everyone lowers.
- STR- 23, more than everyone else, is responsible for the attack power in melee, but for us it has no important meaning.
- DEX- 23, for us this is only the speed of movement, dodge and the probability of blocking shields, we are second only to the Light Elves.
- CON- 24, this is the amount of Life (HP) and its recovery, Resistance to Shocking attacks and the amount of weight carried, here we are also in last place.
Character development
Level 1-20
Level 20-40
- Complete the Path to a Shillien Oracle quest
- It’s better to level up solo in the early stages, like a magician (unless, of course, you started playing in a group), don’t waste time looking for random parties. I also strongly recommend completing the quest for your pet and downloading it:
- if you prefer to play solo or your online is small and inconsistent - Wolf Quest
- if you are seriously focused on playing for this class - Kookaburra Quest, it will come in handy more than once.
- Basic skills:
- Disrupt Undead - deals damage to undead. We learn first.
- Resurrection - resurrects a dead player or pet.
- Group Heal - restores HP of group members
- Dryad Root - immobilizes the enemy for 30 seconds
- Recharge - restores target's MP
- Buffs:
- Concentration - reduces the chance of a spell being missed
- Might - increases P.Atk.
- Wind Walk - increases running speed
- Empower - increases M.Atk.
- Focus - increases critical strike chance
- Mental Shield - increases defense against paralyzing/holding/mental attacks
- Shield - increases Physical Defense
- Vampiric Rage - part of the inflicted physical damage. damage goes to HP
- Resist Wind - increases defense against air attacks
- Passive skills:
- Quick Recycle - reduces skill cooldown time
- Robe Mastery - increases P.D. when wearing a robe
- Boost Mana - increases max. number of MP
- Fast Spell Casting - increases the speed of casting spells
- Fast HP Recovery - increases HP recovery speed
- Fast Mana Recovery - increases MP recovery speed
- Swing zones:
- from 20 to 25 - Ruins of Despair (Ruins of Despair).
- from 25 to 35 - Execution Grounds (Land of the Executed).
- from 35 to 40 - Death Pass (Death Valley) (Death Valley) on undead x2.
- Equipment:
- Komon Elven jewelry set
- Common Item - Ghost Staff
Level 40-52
- We complete the quest for Shillien Elder
- It's time to install the tattoo:
- +4 WIT -4 MEN (to increase spell casting speed)
- +4 CON -5 STR (because we still don’t have enough HP, but we don’t need strength)
- Options:
- or +1 WIT -1 MEN (to increase spell casting speed)
- or +4 DEX -5 STR (for those who want to run fast)
- New skills:
- Stigma of Shilen - with a 100% probability of passing, it reduces defense in melee (-16% of lvl 1 skill and -40% of lvl 4 skill).
- Inquisitor - transformation available from level 44. In transformation, most of the skills are not available, but unique attack skills and debuffs are added. The Inquisitor's nukes are similar in strength to the nukes of a full-fledged mage. All skills have the attribute of holiness. They don't need to be taught. Their level increases automatically. The transformation skill is almost recoilless.
- Purify - removes paralysis/bleeding/poison from the target
- Greater Group Heal, Greater Heal - improved analogues of Heal/Group Heal. Additionally restore HP for 15 seconds
- New buffs:
- Death Whisper - increases critical attack power
- Guidance - increases accuracy
- Exping:
- It's time to think about finding a party or a magician friend (or better yet, several).
- At the party your main skill will be Recharge
- Solo:
- up to level 44 - Death Pass (Death Valley) (Death Valley) on the same undead x2.
- from level 44 - learn the Inquisitor skill, and you can go to the Outlaw Forest (Forest of Robbers) and kill gargoyles up to level 52.
- Equipment:
- Karmian set Phys. Def. +5.26%, Spd. Mag. +15%
- Set of komon jewelry Shackles
- Weapon:
- For solo player: Homunculus's Sword [Acumen] Increases Spd. Magic by 15%
- In the party: Homunculus's Sword[Conversion] Increases Max MP by 60% and decreases Max. HP by 40%
Level 52-61
Level 61-76
Level 76-85
- We turn in the quest Saga of the Shillien Saint.
- New skills:
- Block Shield (77) - Removes the effect of enhancing P. Def. spells from a target. Temporarily reduces P. Def (-10%). and prevents the enemy from receiving enhancing P. Def.
- Arcane Wisdom (78) - Reduces MP consumption by 30%, reduces casting speed by 10%. Consumes 50 HP per tick.
- Mass Recharge (80) - pours 1.5k MP to party members. Cooldown 1 hour.
- Throne Root (80) - Instantly applies a Hold effect to surrounding enemies. Continuously lowers HP.
- Enlightenment (81) - For 20 sec. increases M. Atk. by 10%, treatment efficiency by 40%, Speed. Mag. - by 50%, chance of Crit. Hit by magic - by 50%. Reduces MP consumption by 90%.
- Turn to Stone (81) - Turns into stone, protects from damage for 8 sec.
- New buffs:
- Arcane Protection - increases protection from kennels and debuffs.
- Prophecy of Wind (78) - gives the following effects: Max. HP +20%, critical chance. Atk. +20%, magic power. Crete. Atk. +20%, Phys. Atk. +10%, Phys. Def. +20%, Spd. Atk. +20%, M. Atk. +20%, M. Def. +20%, Spd. Mag. +20%, resistance to negative effects +10%, Speed -20%.
- Mana Gain (79) - Temporarily increases the target's MP recovery efficiency.
- Lord of Vampire (83) - gives the effect of vampirism with an efficiency of 80% for 30 seconds.
- Passive skills:
- Health - Increases resistance to poison and bleeding.
- Sigil Mastery - When using the Seal (Sigil), increases the effectiveness of treatment by 30 and MP recovery by 17%.
- Wisdom - Increases resistance to slip, root and other mental attacks.
- Skill Mastery (77) - extremely rarely makes it possible to use a skill without a cooldown, or to apply a buff with doubled duration. The chance of triggering depends on INT.
- Divine Lore (78) - Reduces MP cost for magical skills by 5%.
- Magician's Will (81) - Increases M. Atk. by 5%, M. Speed - by 5%, magic critical strike chance - by 5%. Reduces MP consumption by 5%.
- Protection of Alignment (82) - M. Def. Increased by 15%. When a character receives damage, Mage. Def. additionally increases by 1000.
- Protection of Elemental (82) - Elemental resistance increased by 20. When the character receives damage, M. Def. and resistance to the elements is further increased.
- Protection of Rune (82) - Elemental resistance increased by 20. When the character receives damage, M. Def. and resistance to the elements is further increased.
- Exping:
- It’s already very difficult to level up solo, but if you like it, then you’re on your way to Varka/Ketra, Hot Springs or Crystal Island (IOP), Dino Island.
- A calm and relaxed place to swing 73-78 - the third Pailaka. The walls are demolished with a bang by AoE nuke in Inquis, the dragon is killed without any problems with the spam of free QHP, there are no problems with MP, there are plenty of herbs. Naturally, you must not pass the quest until ~77.80%. Instance rollback - 4 hours.
- In the magic party - FOG, crystal island (iop), primeval island.
- 80+ in Tully on HB.
- Fighter party:
- up to 78 - kats, ketra\varka, tomb of the emperors (Imperial Tomb).
- 78+ - HB only.
- Equipment:
- 76-80:
- 80-85:
Sub skills
Maine can get 4 skills from each subclass, for a total of 12 skills from 3 subclasses. I recommend taking these skills:
- Counter Defense - when hit, there is a chance of increasing physical and magical defense for a while (+20% PDEF/MDEF for 15s)
- Boost CP - increase max. CP on 738
- your choice, from counter spirit to mana steal
Transfer of skills
You need to have 4 Holy Pomander - Shillien Saint, you can get them by acquiring a third profession. The task is completely simple - get to the Dark Elf guild, which is in any city, and approach your Skill Master.
- Click “Learn about the skill shortcut” (Skill Link)
- Next "Install the skill shortcut into the case"
- And here we may encounter confusion - “Where are my books for which I can get skills?” It's very simple - If you received the third profession BEFORE grace plus, then your items will either be in the warehouse or in your backpack.
- If the update has already passed, and you have not yet received the Third Profession, then know that when you receive the profession, you will be given 4 items, which I talked about at the beginning of the guide.
- If all 4 skills have already been selected, but it turns out that you are blonde and took the wrong skills - it’s not scary, the same 10kk will correct the situation instantly.
- We go to the same wizard, click on the same Shortcut Information
- They take 10kk from us, and in return we get 4 books.
- Thus, bishams and eishkas will have to pay 10kk for changing one skill, and we, black gimps, will have to pay the same 10kk but for 4 skills. Finally there is a holiday on our street.
- Attention, when resetting skills, ALL four skills will be reset!!!
These 4 skills allow you to create your own unique build. I will highlight three options:
- PvE
- Major Heal
- Major Group Heal
- Clarity
- any to your taste, my advice - Party Recall
- PvP
- Major Heal
- Major Group Heal
- Magical Backfire
- Mass Resurrection
- Olly
- Major Heal
- Resist Shock
- Magical Backfire
- also any skill, from BGH and celestial to mana storm.
PvP
- Our place in pvp- behind the backs of fellow party members. You need to stay as far away from the enemy as possible, while maintaining the distance at which the heal is cast on the bisha. It is also important to remember: the longer you run in PvP, the more problems the enemy has with killing you.
- Our role in pvp- this is pouring mana into the entire party, hill bish and others, if possible. It is also critically important to remove jellyfish and paralysis from the party in a timely manner. If you are in a party, it is important to dispel the stigma in a timely manner. If you have a free second, we start debuffing (backfair (if you took it), shakli, stigma, shield block, forget about the root - without epics the chances of passing are zero).
- And don't forget to run! - this is the basis, the nuances and subtleties of the game will come with experience.
- Also wear a shield in PvP, it will give much more advantages than a sigil.
Olympus
With the advent of skilllink, we can become, if not a serious ollie farmer, then a threat to all average players. It is important to understand that for a serious approach to Olympus you need a lvl close to the top one, highly sharpened skills and gear close to the top one (a set of uniques, sharpened armor and a weapon with a nuke, or better yet two). It is also useful to have several sets with different attributes to change them to suit the enemy. The tactics for most battles are the same - burn out mana and attack with drugs.
Basic tactics:
- daggers- throw backfire and shackle, burn out mana. We constantly heal to full HP as soon as it drops to 3/4. The dagerman without mana is meat for us, we kill him with a nuke with HP.
- healers- backfair and mana burn. Whoever burned the mana faster won.
- magicians- by hook or by crook (celestials, self jellyfish, etc.) or by crook, survive their enlightenment, if it works - backfair and mana burn, self heal - victory.
- selfers- remove the moonshine, burn mana, kill with nuke
- tanks- we pray that it lags, we hit it with nukes on the rollback, simultaneously burning mana.
- archers- Shackle, burn mana, hit with HP.
- smooth- shakl, burn out the mana so that he doesn’t hit with his main skills, but shoots with long-range current. snoop with LS.
- shooting gallery- shakl, burn out the mana so that he doesn’t hit with his main skills, but shoots with long-range current. It is advisable not to let anyone get close to you or to sniff you with DMs.
- dwarves, spearmen- shakl, burn mana, nuke with drugs.
- bd\svs- shakl, burn out mana, if it’s too hard, you can run for 2 minutes after the start of the battle so that the songs/dances die down (without mp they won’t be hanged again), nuke with drugs.
- destr- pray and act as with the others: shakl, burn out mana (this will deprive him of only half of his skills, and not all of them as with the others), nuke with drugs. It is also critically important to survive the limits of destruction by hook or by crook.
- bers- backfair and heal until his mana runs out, then shackle and LSami.
- executioner- buff correctly at the beginning (the most important buffs first, then absolutely all buffs (even unnecessary ones) and cans from the heat, for fishing), as the battle began - backfair and burn mana. If we're lucky, we'll win.
Talismans
On Olympus we may need talismans:
Sources
© 2008-2019, Linedia - knowledge base and encyclopedia of the Lineage 2 game in Russian: quests and descriptions, walkthroughs and articles, things and monsters, classes and races, manuals and guides, skills and abilities.
I decided to create this guide, because I didn’t find anything like this, and what people ask in the game, sometimes not beginners, but who were previously used to playing DD, where to swing or are looking for a party for a long time unsuccessfully, because almost everyone runs with “drivers”...
So, maybe my method is not the fastest in terms of downloading, but it is independent and is the golden mean, because the time investment is small, plus you can fill adena...
The quality up to lvl 20 is, of course, the same for everyone, because without a professional the skills are the same...
Then, after 20, the skill for the undead appears, there are 2 options: either, upgrade wind strike from lvl 14 with a skill, or go for the undead, if we go for the undead, then here good places little, because basically everywhere there are mobs mixed up, but after 24-28 I usually go to HP (depending on the equipment/buff available), because there are 2 undead mobs - fettered soul, I bypass bulls and ogres, and for that, up to lvl 32 it is advisable to hang roots (roots) and beat dispurt undead... In general, here you can easily level up to normal levels up to lvl 40...
40-44 lvl - you can get good at the 2nd floor (group undead), but it’s better to go there with someone because the mobs are aggro, and they can kill you easily if you get mixed up, because 50+, 1 with a stun, eats 1 mp.. You can go to devil isle (from giran TP), but it’s hard there because of the lukari with a stun - you have to hit 1st, otherwise they’ll score))
At lvl 44 I go to the cemetery (cemetery near Adena), and in the middle, because... there are exclusively undead (Ghosts, skeletons, etc.) and cans drop on MP/HP, which is also very good...
It should be noted that leveling up her/bisha after lvl 44 is faster, because they continue to develop a skill against the undead, only under a different name, but she/pp will have to be content with a skill from lvl 36, but you can also level up well with it, because this skill is cast at 1 .5 times faster than analogues of combat skills from cx (hurikana), sps (hydroblast), sorc (prominence) for example...
In general, in this location I recommend reaching lvl 56
At lvl 56, go to the ruined castle (devastaion castle) and you can stay there until 66, the only thing I advise is to go to the end where there is only one undead, and do not touch the group ghosts if you are solo, and dressed in the same grade, because You won’t be able to pull it off, at least the root doesn’t really help there, because... there are 4 magical ghosts, they hit you with magic painfully... You need to hit them first, and then the physical ones... In general, I pushed through the grade, but with difficulty (or rather, with healing after the first two)..
You can, of course, improve on a transform (she/ee), but it will take longer, because you can’t handle group mobs, and secondly, there’s a greater chance of dying (no rooting, no healing)...
Then, after 66, everyone chooses their own path, depending on their goals - some for the sake of Olya, some for the clan/CP, others download drivers, etc... I personally developed it for Olya, so I went with the transfoy in BS quality, and filled with moons, and swung))
Briefly about gear:
1) First, as quickly as possible, the devotion set (+15% caste) - ng set, at lvl 20 we put on the top and pepper boots, the same set, up to lvl 40, fluff atuba mace (two-handed top d) the best one up to lvl 40 will be
2) 40 lvl - if you have money, of course you can cast a hamka with sa, if not, then as I had it - a Chinese top with a gr staff, and a carmine set, we also put paints +4vit -5men, +4dex -5str, +4con -5 pages..
3) 52lvl - if you have money, we take Avadon Rob Set, Valya and Akumen, in general, if you don’t have money for normal Valyu, run with a top with a staff, it’s a stokzhoe skok at Valya (There’s no point in taking without money, because nipples are expensive and horseradish you'll find more here...